This is me (Well…. PART of me. The part I am sharing today…)

Well……..


This site has been operating for a couple of years now. I post sporadically and I share the recipes that I think are worthwhile – all the while trying to reject my natural tendencies to avoid the illusion of perfection.


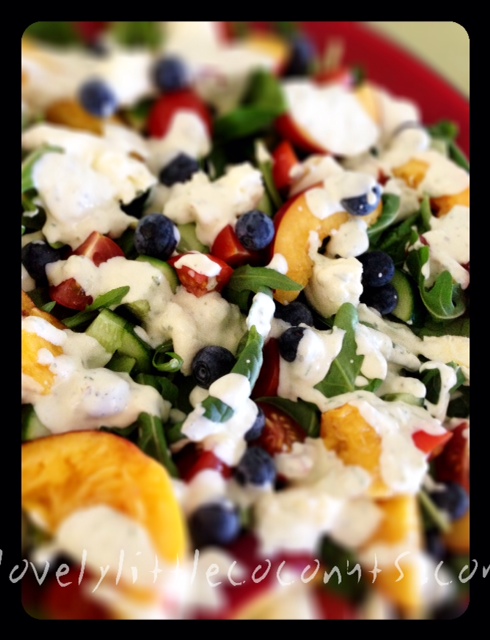
I thought some of you might be interested in hearing a little more of why I do what I do, and why I love ‘real food’.


Here we go! All in the name of authenticity and being open, real and honest……


Angela.

(Mother, teacher, writer. Pursuer of ‘real’. Creator of ‘Lovely Little Coconuts’ and ‘The Muddled Perfectionist’.)

It has been a rough road, trying to figure out how to balance life, disease, children, work, health, relationships and nourishing my family. I fail as often as I succeed.

photo


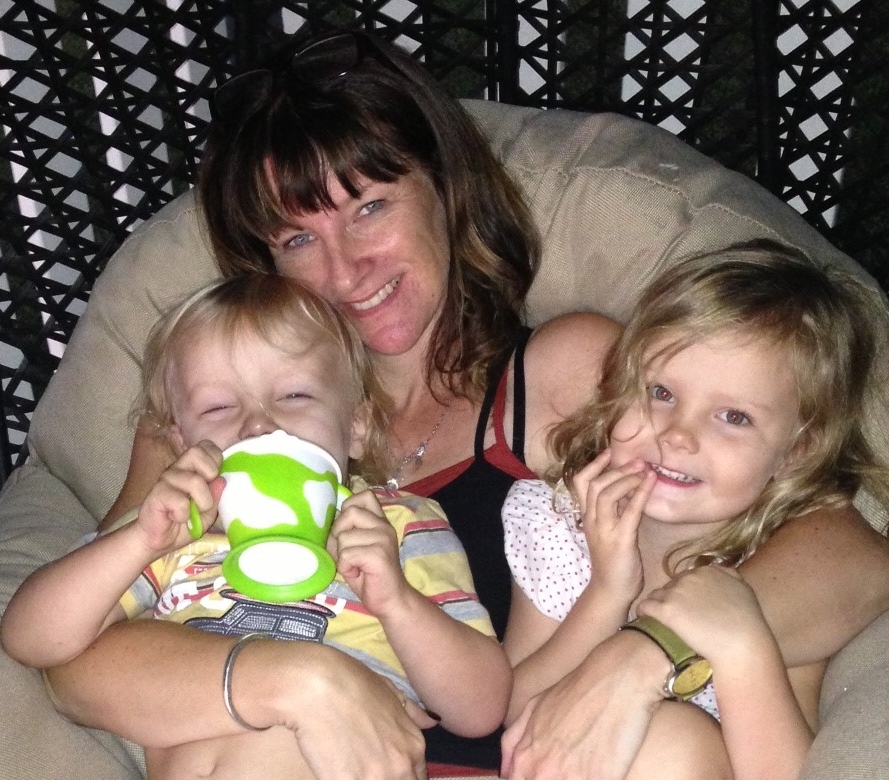
I still remember holding my first born for the very first time. Skin to skin. Utterly exhausted after an incredibly long labour, in complete shock and awe and recognising that a ‘mama lioness’ had been released from her cage.


While being a mother took a long time to navigate with any kind of sense or clarity, for me one thing has always been very straightforward. I want my children to be the healthiest, most energetic and dynamic version of themselves that they can be.


From the moment my daughter was born, she had health issues. Her birth was 4 weeks early and labour was long and difficult. Half of her little tiny body was black at birth due to lack of circulation. She had a tiny red mark across her throat that developed into a large, swollen strawberry birthmark that needed removal at 6 months because it began ulcerating and causing her to sit with her head tipped to the side. She had moderate to severe eczema over the majority of her body. She had what we now suspect was reflux. She spent the first 6 months of her life unsettled, crying and very difficult to figure out.

716_47029591094_5609_n

Sleeping like an angel – 3 days old

Later on, she developed asthma and then tests showed that she was potentially anaphylactic to tree nuts and reactive to a host of other allergens. Until she was around 5 years old, she suffered through marathon meltdowns that we couldn’t understand. We couldn’t see what was triggering her to react in such a dramatic, angry and violent way to the world around her.

The first thing we tried was eliminating preservatives and additives in foods. We gradually removed almost all packaged and factory processed foods from our diet. While we noticed some improvement, we could see we still had a long way to go.

When she was 12 months old, I found out I was pregnant with my son. Apart from being very tired and quite nauseous throughout, it was quite an uneventful pregnancy. I did suffer from some unusual bleeding during both pregnancies, but nothing that warranted further investigation.

The birth of my son could not have been more opposite. Relatively fast and straightforward, he came into the world like a burst of sunshine. No allergies, no lasting complications, calm and even tempered…. I was totally amazed that this little person was made from the same DNA as my daughter.

59562_467714106094_2281465_n

Meeting for the first time

As my son grew, I found myself becoming more and more exhausted. Caught in a vicious cycle of breastfeeding, exhausted from helping my daughter deal with her meltdowns and medical issues, having very little time away from the house or being a mum – I put it all down to motherhood and waited for the day to come when I would feel semi-human again.

It turns out, that day was further away than I could have imagined.

When my son was around 3 months old, I was diagnosed with Ulcerative Colitis (Crohns’ ugly cousin) and began my own confusing health journey. Travelling from hospital, to emergency room, back to hospital, various specialists and a lot of trial and error with medications and diet followed.

For now I seem to have found a happy balance between mainstream health-care, alternative therapy to build my strength, immunity and health and creating nourishing foods to ensure I am gaining maximum nutrition to build and maintain my energy and strength.

Thus, Lovely Little Coconuts was started – mainly as a kind of ‘food-life diary’ to keep track of what I was eating /trialling and to hopefully build my network of whole food enthusiasts.

What a blessing LLC has been! As I sit back and look at all of the wonderful people I have met since the inception of this little page, and the doors it has opened, I am amazed and quite overwhelmed. After it took off like a ‘viral’ rocket (thanks Jo Whitton!) things seem to have settled into a new normality.

It has allowed me to bring together a little group of enthusiastic students at my school who love to hear about how healthy food can be delicious.

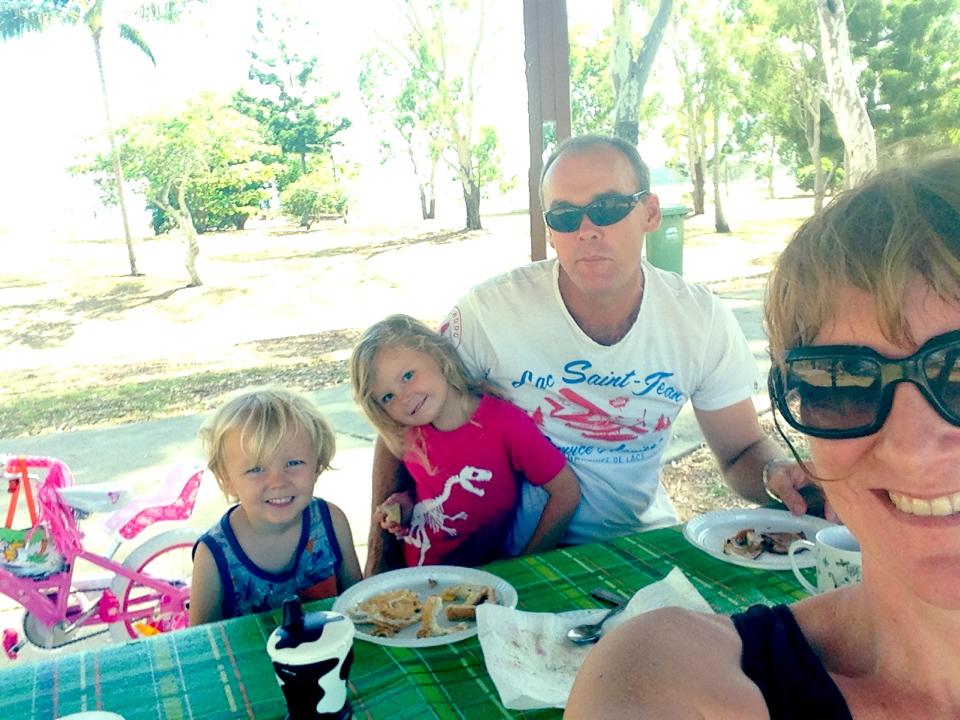
My family’s health continues to improve. We have a long way to go, but I know without a shadow of a doubt we are on the right path.

I have been warmly welcomed into the most amazing tribe of women who empower each other and who believe 100% in the same things I do.

If I have any advice for mums who are beginning their journey into the world of real food it is that it can seem overwhelming and darned confusing, especially at first when you don’t quite trust your inner compass. Take baby steps. Listen to your body. It will absolutely not happen overnight – these changes are continuous. We have been on this path for close to 5 years now, and we are still altering our approach. Tweaking what we do. Discovering something new.

And that’s ok. Because that is the beauty and mess known as ‘Life’s Journey’.

1526930_10152166033431095_922469157_n

Health is a gift we don’t take for granted. Enjoy every minute!

Easy, family friendly Chicken Curry

This is a very simple curry base that I have used for chicken or fish. Any delicate meat will work well. Even tofu would be a winner (if you swing that way!)


I generally don’t measure when I cook, and this curry is no different. Always taste as you go to alter or balance the flavours to suit your family’s taste.


Gluten free, dairy free (if you don’t use butter), nut free and very tasty!


Chicken curry 2

Ingredients:

1 onion

1-2 cloves of garlic

Fresh ginger (approx 2cm piece,peeled)

Large handful of fresh herbs (I use curry leaf, thai basil, garlic chives, 2 bay leaves)

1-2 T curry powder of choice (I wouldn’t recommend ‘Keens’ as I find the flavour a little harsh, but if you like it, use it!)

3 large, ripe tomatoes

1 T fish sauce (or to taste)

1 tsp sesame oil (or to taste)

1-2 T white balsamic vinegar (or acid of choice – lime juice is nice)

1T rapadura / coconut palm sugar / raw sugar

Salt and pepper

500g chicken (thighs work best because they retain their moisture, but I used breast last night and it worked just fine), sliced

3/4 cup thick coconut cream

Cooked millet to serve


Method:

1. Finely chop onion and garlic and fry in oil (or ghee or butter) until soft. Add grated ginger and allow to soften a little.

2. Stir through finely chopped herbs and curry powder. Fry off until fragrant.

3. Finely chop tomatoes and stir through. Allow to simmer for a few minutes.

(Steps 1-3 can be easily covered in TMix – after chopping and sauteeing onion mixture, add herbs and turbo for a few seconds, scrape down and add tomatoes. Turbo for a few seconds until smooth. You could continue cooking the curry in TM, but I like to pour into my pan and continue cooking in there so I can cook my millet to serve with the curry in the Thermie)

4. Add the fish sauce, sesame oil, vinegar, sugar,salt and pepper. Stir through and continue to lightly simmer until the sauce has reduced by around 1/4 of it’s volume. Taste and adjust seasonings if required.

5. Add chicken and allow to continue to simmer for around 15-20 minutes. While the meat is cooking through, cook your millet in the Thermie (or on the stovetop) in salted water or stock. (Using the Thermie bowl is fantastic here if you used it to chop your herbs, onion etc as the flavour goes through the water and the millet)

Chicken curry

6. When the chicken is just cooked through, add coconut cream and stir through. Allow the sauce to warm through again before serving.

7. Serve with millet and steamed greens (if you have them).


Enjoy!

Crunchy Noodle Frittata

Using up leftovers is one of my favourite things to do. Not only is it budget friendly, it gives me such a sense of satisfaction to make something delicious from next to nothing.


This little gem was created today, using leftover adzuki bean noodles, eggs and a few fresh salad ingredients. Sub the butter for alternative fat of choice and leave out the cheese to make it dairy free.


Noodle frittata


Gluten free, cheap as chips, packed with nutrition and protein and so simple.


Ingredients:

3/4 cup of leftover noodles (firmer noodles work best)

2 eggs

Cheese

Butter

Fresh salad of choice (I used tomato, cucumber, avocado and baby spinach with fresh lime juice. Bean shoots would be a great addition – whatever you love to eat really)

Salt and pepper


Method:

Melt butter in small frypan on low to medium heat.

When it just starts to bubble, pop your cold leftover noodles in the pan and allow to cook until it begins to crisp slightly on the bottom.

Whisk eggs, add salt and pepper and pour into pan. Allow to cook approx 3/4 of the way through. Flip.

Allow to brown on other side while you add the cheese to the top.

When cooked, remove from pan and top with salad of choice.


Prepare to feel satisfied for the rest of the afternoon 🙂


Beginners Cheesecake

Cheesecake

So.

If you don’t eat dairy, look away now!

I have been searching high and low for a looooong time for a dairy-free, cashew-free cheesecake with no success. I did find a few ideas based on silken tofu, but I limit the amount of soy in my diet as well as dairy, so that wasn’t going to work either.

I finally decided I was being WAY too precious. I don’t need to eliminate dairy. Just reduce my intake.

So I took the plunge and grabbed the cream cheese and threw caution to the wind.

Basic, rich and satisfying, this cheesecake ticks all the boxes. As well as gluten-free with no nasties, organic berries and sweetened with unrefined sweetener. What’s not to love?

Cheesecake

Base:

2 cups activated almonds (or regular, raw almonds will work fine), ground as fine as you desire.

3 tbsp melted butter

3 tbsp rapadura or coconut sugar (or dry sweetener of choice)

Mix all ingredients together well.

Press firmly into base of springform tin lined with baking paper. Refrigerate until firm.

Filling:

750g cream cheese (NOT low fat or spreadable) – room temperature

1/4 to 1/2 cup rapadura, coconut sugar or dry sweetener of choice, to taste

vanilla (I use my home made vanilla which is split vanilla beans steeped in vodka)

250g sour cream (again NOT low fat)

Whip cream cheese, sweetener and vanilla until light and fluffy (this took about 4 minutes on Sp 4 in thermomix, butterfly in). Gently mix in sour cream, a spoon at a time, until incorporated. Mixture will ‘fall’ a little when you do this, but that’s ok.

Pour / scoop / spoon mixture over almond base. Smooth the top, refrigerate for several hours – overnight is even better – and proceed to lick the bowl before the children find you!

Topping:

1-2 cups frozen, mixed berries (organic)

Vanilla

1/4 cup maple syrup (or to taste)

Gently heat the vanilla and maple in small saucepan. Add berries and allow to soften for a few minutes. Remove berries and allow the liquid to reduce slightly. Place berries and liquid back into the fridge together to chill.

To serve:

Warm a knife under hot tap water and run gently around the outside of the tin to loosen the edges. Gently remove the outer section of the tin. Spoon berries and sauce over the top of the cheesecake just prior to serving.

Cheesecake

** Note: This is a very rich cheesecake, however it is not overly sweet. Feel free to add extra sweetener, taste as you go.

Enjoy!! 🙂

Gluten-Free Chocolate Chunk Cookies

Choc chip cookies 2

AnnieB asks me every weekend for cookies. And every weekend I dodge the subject and convince her she REALLY wants cake. Or muffins. Or banana bread. I do not know why I avoid cookies like I do? Maybe my aversion to sticky messes? Gunky hands and lots of washing up?

Yesterday I weakened and started Googling. I stumbled across this recipe from The Gluten Free Goddess and could see the  ‘tweaking’ potential immediately. THEN I realised I could ‘amp’ up the nutritional value with some Berry Choc Chunk and I was committed. Cookie demons, beGONE!!

I used the Thermomix, but you could easily use traditional methods. I found thermie was perfect as I could grind my buckwheat flour and chop up my chocolate in the process.

Choc chip cookies 1


Ingredients:

1 cup buckwheat (ground into flour)
1 cup sorghum flour
1/2 cup tapioca starch
1 1/2 teaspoons xanthan gum
1 1/2 teaspoons baking powder
1/2 teaspoon bicarb soda
1 teaspoon sea salt
1 cup coconut oil or butter (I used a combination, approx 2/3 butter, 1/3 coconut oil)
1 cup rapadura or coconut sugar
1 tablespoon vanilla
1 tablespoon honey or rice malt syrup
2 eggs
3 tbsp milk of choice (I used dairy – you could use coconut, rice, almond)
150g roughly chopped dark choc of choice (I buy the best I can afford, avoiding soy and refined sugars where possible)
Method:
1. Mix all dry ingredients together well (except dark chocolate.)
2. Combine wet ingredients (except for milk)
3. Add wet ingredients to dry, mixing well. The mixture should be wet enough to ‘drop’ onto cookie sheet. If you need it, add the milk and mix through.
4. Gently stir the chocolate chunks through.
5. Drop generous spoonfuls onto cookie sheet and bake in a moderate oven (approx 160 deg, fan forced) for approx 10 minutes.
6. Remove and cool on wire racks. Store in airtight containers.
The cookies are best eaten within 2-3 days (weeeeelllll….. actually they are BEST eaten on the day of baking while still warm with a side of vanilla ice cream, but I understand some people will want these in lunchboxes…..) as they become a little dry and crumbly after a few days.
If they do dry out, crumble them up and sprinkle over fruit, ice cream or add to fruit crumble toppings. Yummy!
Enjoy!! 😀


Lunchbox snacks – Superfood Bites

Hi, my name is Angela, and I am a TERRIBLE blogger! I cook and I cook and I eat and THEN I remember I should actually be taking pictures of some of this food and sharing the recipes!

Today I remembered. Mid-chew I stopped, took some pictures and tried my very best to remember what I had thrown into the bowl to create these little morsels of YUM…..

Here goes:

SUPERFOOD BITES

Image

I made the yummy Carrot Cakes from Cooking for Busy Mums and began browsing for some other lunchbox bits and pieces for the week.

I found these scrummy looking bikkies and thought I would have a play with the ingredients I had in my pantry, as you do 🙂

Ingredients:

1/2 cup quinoa flakes

1 cup puffed rice

1/4 cup puffed amaranth

1 tbsp chia seeds

1 tbsp sesame seeds

1/4 cup sunflower seeds

1/2 cup dried fruit, chopped (I had dried mulberries and pineapple on hand – you could use whatever you prefer)

1/2 cup Berry Choc Chunk

1/4 cup C Berry Blast

2 tbsp raw cacao powder (because you can never have too much chocolate, dontcha know!)

1 cup preferred plain flour (I used spelt which is NOT gluten free)

100g melted butter or coconut oil

1/4 cup maple (or rice malt syrup)

1 tsp bicarb soda

2 tbspn boiling water

Method:

1. Mix all dry ingredients together in a large bowl.

2. Melt butter, add sweetener and mix thoroughly.

3. In a separate small bowl mix bicarb and boiling water together.

4. Pour melted butter mixture into dry ingredients with bicarb mixture and stir through well.

5. Grease mini muffin tins with a little coconut oil or butter. Lightly press spoonfuls into each section.

6. Bake in a moderate oven (fan forced around 160 deg) for approx 10 minutes.

7. Allow to cool completely before removing from tin.

I have to say, the kids literally licked their plates clean and I had to hide the remaining bites so there would be some left for lunchboxes!

Enjoy 🙂

Image

Chicken and Nectarine Salad – and stuff

I’m back!! It’s been so long between posts that I had to retrieve my password! True story!

What a year! Blog and Facebook page started on a whim, my eldest ‘baby’ finished her Kindy year, we found out the company my husband worked for was closing it’s doors, we made plans to leave Mackay – then stay – then leave again – then finally STAY put for at least another year, I was fortunate enough to be granted a term of Long Service Leave so I could be a stay at home mum for 10 weeks and I found a wider circle of beautiful, like minded people who share my passion for honesty, simplicity, real food and living an authentic life.

These wonderful, shiny-bright souls are the little jewels that stud the fabric of my life. Some of them I see regularly, some of them not regularly enough! And some of them live in my ‘on-line’ world. I am grateful for every one of you.

If we were all coming together and bringing a plate, I think I would combust from the sheer decadence of having all of your company in the one room. (And can you imagine how fantastic the menu would be???? OMG!!)

This is what I would bring to share with you all 🙂

CHICKEN SALAD WITH NECTARINES

Chicken and nectarine salad

Ingredients:

Salad (place all ingredients in bowl and toss gently):

Salad mix of choice (I used baby spinach, rocket and baby kale)

Cucumber (diced)

Tomatoes (diced)

Capsicum (sliced)

Nectarines (stone removed, sliced)

Blueberries

Bocconcini cheese (pulled into small pieces)

Chicken:

Chicken breasts (1 breast for every 2 people)

Salt / pepper

2 tsp White balsamic vinegar

Dressing:

1/2 cup mayonnaise

1/2 cup creme fraiche (or sour cream)

large handful of fresh thyme

large handful of fresh oregano

small handful of fresh mint

3 spring onions

zest of one lime (or lemon

juice of 1/2 lime (or lemon)

salt and pepper

2 tsp pure maple syrup

Method:

Season chicken and fry in hot pan until just cooked through. Remove and set aside to rest for a few minutes, drizzle vinegar over the top while resting.

Combine zest, herbs, spring onions in blender (or TMix) and whiz until fine. Add mayo, creme fraiche and lime juice and combine. Add salt, pepper and maple syrup according to taste and combine well.

Assemble the salad by placing warm sliced chicken over the salad ingredients and drizzle dressing over the top.

A perfect light meal on a hot Queensland tropical evening. (Oh, and if you have some kombucha or cider on hand to serve alongside this, it goes down a treat!)

What are your favourite summer recipes?

Lunchbox treat idea #1 – Tiny vanilla cakes

Bikkie baker 2

My daughter took these to Kindy today. Every week a child has a turn to bake for the whole class. They wear a little ‘chef’ hat and ‘chef’ apron and serve the other children with ‘chef’ tongs. The whole thing is just very sweet and adorable. (And I have it on good authority – most children came back for seconds! No IDEA these little beauties are healthy 😉 )

This is an easy little lunchbox snack that can be whipped up really quickly (in around 30 seconds if you have a thermomix) and kept in the freezer to be added to lunchboxes as an extra treat.

I used Quirky Jo’s recipe for GF Buttercake with a few adjustments along the way. The original recipe can be found here….. Just look further down the page at the Butter Cake variation.

Ingredients:

  • 300g spelt flour
  • 1/2 tsp fine sea salt
  • 2 tsp baking powder (aluminium free)
  • 100g rapadura
  • 140g coconut oil
  • 260g milk (of choice – I use organic, non-homogenised, full cream, you could use almond milk etc if you are dairy free)
  • 1 tsp apple cider vinegar
  • 1 tsp vanilla extract
  • 2 eggs

Mix together on Sp 5 for 20sec. Scrape down and mix for a further 5 sec, Sp 5.

Spoon into mini-muffin tray and bake for approx 12 minutes in 160 degree oven. Test cakes are ready by touching the centre. If it bounces back, they are cooked.

Cool slightly and remove from pan.

Makes approximately 48 little cakes.


Bikkie baker 1


When cooled completely, top with either freshly whipped cream and fruit of choice or coconut cream ganache and additive free sprinkles (like Hoppers).


Ganache:

100g raw, organic dark chocolate

1/2 cup organic, pure coconut cream


Cook, 50 degrees, Sp 1, 5 minutes.


More lunchbox ideas coming soon! Enjoy!

Ultimate Comfort Food! Slow Cooked Beef Cheek Casserole…

Beef cheeks 2

Rich, tender and luscious! The ultimate comfort meal on a cold winter night!

I was first introduced to beef cheeks by my gorgeous neighbours. They are the most wonderful and amazing people. They are now retirees and they have led the most inspiring life (and still do). They have owned butcher shops locally (amongst a hundred other amazing business ventures!) and they KNOW their meat!  They have become surrogate parents to us and stand-in grandparents to our children. They will remain an integral part of our lives always.

 Marlene first introduced me to beef cheeks some time ago when she asked us over for dinner. Now, I am pretty brave when it comes to food and I will have a go at pretty much anything. So imagine my excitement when she announced this little beauty was on the menu!

This is a variation of Marlene’s recipe. She throws hers into the oven in an earthen or cast iron pot – with onions garlic and tomato. That’s it! Even though my version has a few more ingredients, both dishes are succulent and absolutely satisfying and rich.

I hope you enjoy as much as we do!

Ingredients:

  • 1 kg beef cheeks (organic if you can get them)
  • 1 large onion
  • 3 organic garlic cloves
  • 1 tbspn apple cider vinegar
  • 3/4 cup tomato passata
  • 3 tbspn red wine
  • 1/4 cup rapadura
  • 1/4 cup organic tomato paste
  • 3 large, ripe tomatoes
  • 1 1/2 tbspn coconut aminos (or soy / tamari sauce)
  • 2 tbspn vege stock paste (recipe from Thermomix EDC)

Beef cheeks

Ready to cook!!

Method:

  1. Slice beef cheeks with a very sharp knife. The meat is incredibly tough when raw, but it softens to a meltingly tender texture after the long, slow cooking process. Add to slow cooker.
  2. Chop onion and garlic and throw on top of the meat.
  3. Add all remaining ingredients and stir until combined.
  4. Cook on low heat for up to 10 hours. (The longer the better!)
  5. Serve with desired accompaniments – eg sweet potato fries cooked in coconut oil and blanched snow peas / whipped potato mash / sweet potato mash / polenta.

Enjoy!

Beef cheeks 3

Winter Warming Breakfast – Choc Cinnamon Rice with Pear

Choc rice 2

Comfort food PLUS! What could be more cosy on a bleak, grey morning than warm rice, chocolate, cinnamon…..softly cooked pear….. (hold on, I just gotta go check my fridge – I’m sure there are leftovers in there……)

Pears are so sweet and yummy right now! Juicy and firm. The window of  ‘pear ripeness’ is regretfully narrow. Back in the day I worked at a Fruit, Veg and Health Food shop (see, it’s always been in me to love all things wholesome and healthy!)

I remember my boss telling me to get in and buy up the pears as they are at their peak for approx a week, maybe two during the season. Then they becoming ‘trickier’ to ripen.

The pears in this recipe provide a soft, warm, sweet burst of flavour and texture while you eat. Delicious!

Ingredients:

  • 150g arborio rice (I used arborio because I needed it to cook quickly this morning.  Brown would be fine. I’d like to try it with quinoa)
  • enough milk to fill up to the 1 litre mark in the TM bowl (you could use coconut milk, almond milk etc)
  • 2 tbspn pure, organic maple syrup (or to taste)
  • 1/2 tspn cinnamon
  • 2 tbsnp raw, organic cacao
  • 2 (just) ripe pears, cored and chopped into quarters, then quarters again

Pear

Method:

  1. Place all ingredients into Thermomix.
  2. Cook on Sp 2, 20 minutes, 90 deg

It will thicken on standing – great to pour straight into your Thermoserver.

That’s it! Enjoy!

(If you don’t have a Thermie, you can use a saucepan. Just continue to stir gently to ensure it doesn’t stick.)

Choc rice